Land Configuration
Land Configuration Overview
Objectives
• Understand How Land Area is displayed
• Understand Advance Search
• Understand Search box and drop down options
• Understand Land Area Drop Down List
• How to add a new Block
• How to add a new Parcel
Overview
LandMaster is the central nervous system of the entire LandMagic System. The data setup created here will be used in each and every application in LandMagic. The Land Configuration application uses a strict hierarchy to manage and organize your land data. Land Configuration is the electronic file cabinet for all your land records. This application will display retired inactive properties (RIP) with their given commodities and varieties.
Important: It is vital that you understand the Land Hierarchy and setup your data in a three tier structure. As previously mentioned, the entire LandMagic system operates using this data and if not setup correctly it CAN cause issues.
Understand How Land Area is Displayed
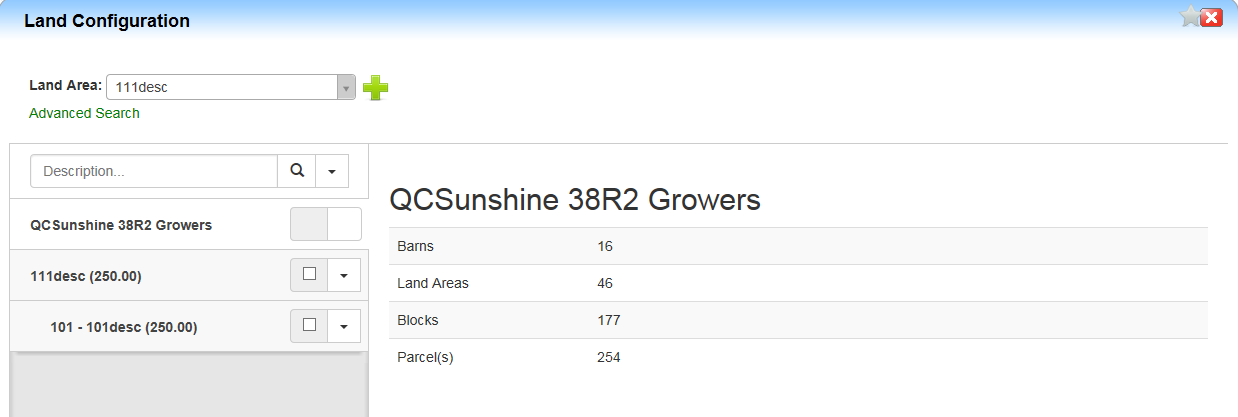
The Land Configuration application displays data based on the company name. To the left will display the company name and below the first given Land Area from the drop down list if there is any or it will be blank.
Below the Land Area will display blocks and parcels with total acreage amounts. To the right will display the company name with the total number of Barns, Land Areas, Blocks and Parcels created. This information automatically displays once you first enter the Land Configuration application.

Understand Advance Search
The Advance Search option allows you to filter and find specific data for the selected Land Areas. This search option allows you to also display any given Land Area whether it is inactive or not.
**Note: This only works if the given information is entered into your system.

Understand Search box and Drop down Options
The search box allows you to search for a block/parcel. This is a fast and easy way to find what you are looking for. Type your description and select the search icon  . The following is a breakdown of items located to the right of the search icon by selecting the down arrow button.

• Bulk RIP – This action button allows you to RIP (retired inactive properties) Land Areas, Blocks and Parcels all at once. There are different levels based on the function needed by the user. For example these are your options:
o 1 – RIP LandArea, Blocks and Parcels
o 2 – RIP Blocks and Parcels
o 3 – RIP ONLY Parcels
• Bulk RIP/Copy – This action button allows you to RIP (retired inactive properties) Land Areas, Blocks and Parcels all at once and copies the given information to new records. This action first inactivates either your Block and Parcels, or just your Parcels, and then allows you to create new blocks or parcels and add a new commodity/variety.
Understand Land Area Drop Down List
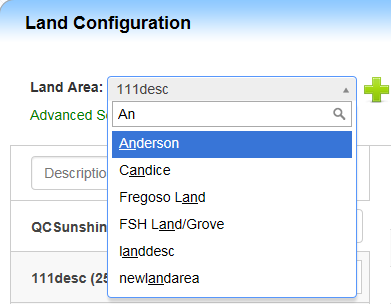
The systems Land Area drop down list displays all Land Areas created in LandMagic. A quick description can be entered and the drop down list will display related search results.

The following is a breakdown of item located to the right of the Land Area drop down list.

Land Area Creation Icon – This icon allows you to create a new Land Area. By selecting the icon, you will be able to create either one or more Land Areas. All fields are required to be entered or selected in order to create a new Land Area.

Code – This is an alpha numeric field you can give to your Land Area.
Description – This is an alpha numeric field allowing you to give your Land Area a name.
Region – Select your region. This is added through Setup Master Data in LandMagic.
State – Select your state. This is added through Setup Master Data in LandMagic.
How to add a new Block
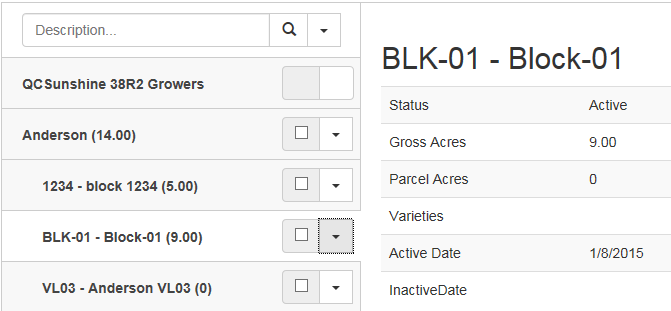
Once a Land Area has been created the name will appear below the Company name with four options. To view those options select the arrow beside the check box.

The following is a breakdown of the items located to the right of the Land Area.
 This icon allows the user to create a new Land Area, Block or Parcel depending on its location.
 This icon allows the user to RIP the Land Area, Block or Parcel. Like the icon above it also depends on its location.
 This icon allows the user to Edit the Land Area, Block or Parcel.
 This icon allows the user to delete the Land Area, Block or Parcel.
Select the green icon to add a new block.
Once selected a window will appear asking how many blocks would you wish to create. Enter the amount and select the green arrow  to continue to the next screen.
Enter the required information to create your new block. Block No and Description are alpha numeric fields. Select the submit icon when finished.

After completion the new block created will display below the Land Area with a slight indention to let the user know it is a block as well as the total amount of acres for the block.

How to add a new Parcel
Next to the block name, select the arrow beside the check box.
The same options will appear like the ones when you were creating a new block. Select the green icon  and a new window will appear asking how many parcels the user wishes to create for that block.
Enter the number of parcels you need to create and select the green arrow to continue. The next window will appear and you will enter the required information in red.

**Note: The total amount of acres must be less than or equal to the block acres or you will receive a message that prompts, “The total of the acres cannot be larger than its parent.”
Select the submit button when completed.
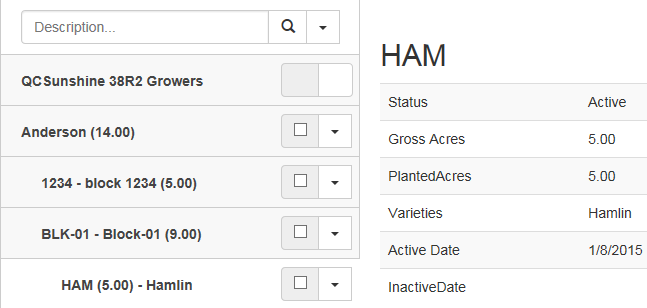
After completion the new parcel will appear below the selected block name with the total amount of acres and a slight indention to let the user know it is a parcel.

Article ID: 1060
Created On: Aug 4, 2015 at 10:10 AM
Last Updated On: Aug 10, 2015 at 9:57 AM
Online URL: http://kb.landmagic.com/article.php?id=1060


