Item Maintenance
How to add a new Item
Objectives
• Item Maintenance Screen
• Understanding the Ingredients tab
• Understand the Safety Data tab
Overview
This article will assist you in adding a new item to your inventory. Completing the extended tab information and entering the ingredients tab information. To start adding a new item select the New Item button the item list page. Please refer to “Item List screen overview” for more information.
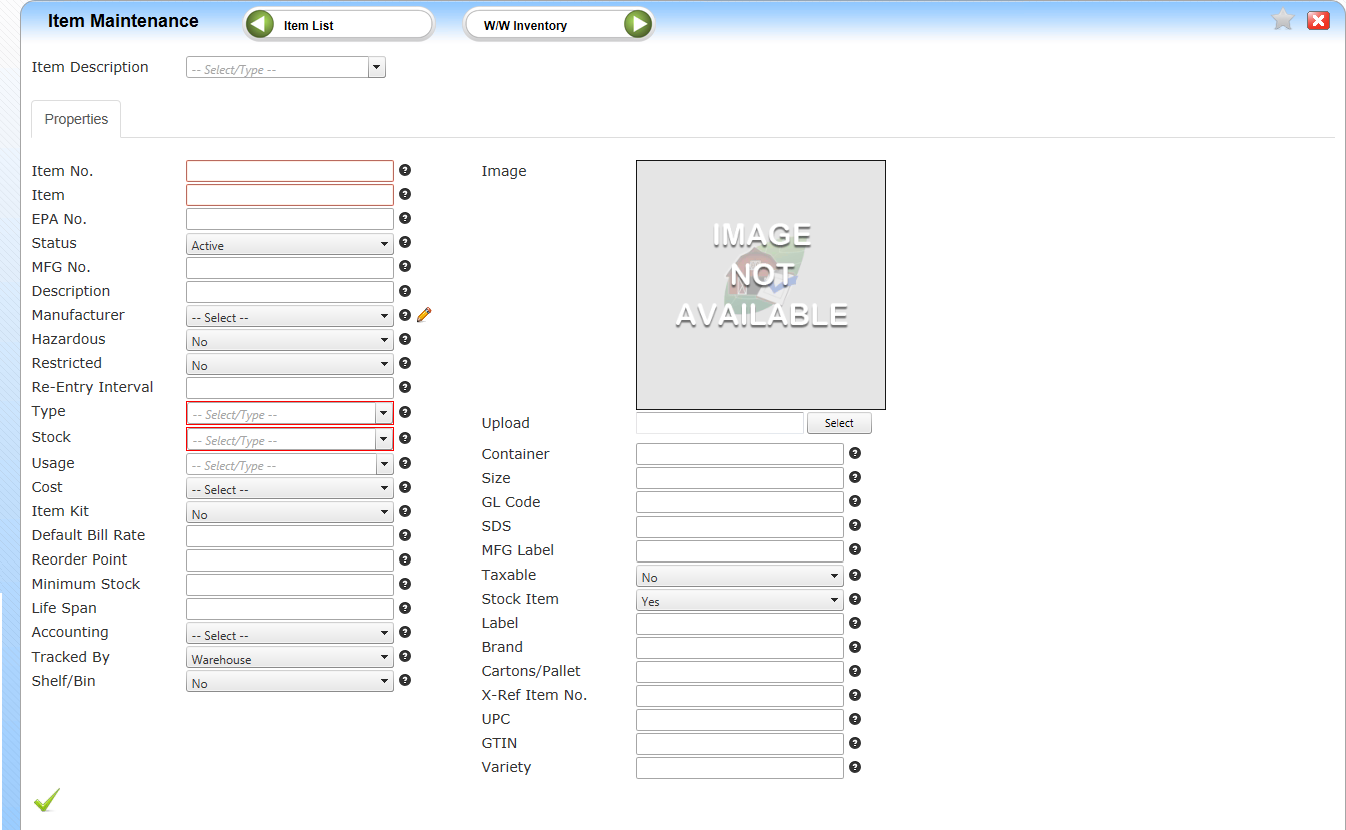
Item Maintenance screen
Properties tab

How to add a new item
1. Item No. - Enter you item number designated (required field)
2. Item - Enter Item description (required field)
3. EPA No. – Enter the Item’s EPA number
4. Status – System defaults to active
5. Mfg. Number – Enter the manufacture number
6. Description – Enter manufacture description
7. Manufacturer – Select the Manufacturer (NOTE: If the Manufacturer is not listed you can click the pencil icon and add a new Manufacturer)
8. Hazardous – Select yes if the item is a hazardous item
9. Restricted – Select yes if the item is a restricted use item
10. Re-entry Interval – Enter time before personal can re-enter after item has been applied
11. Type – Select Type
12. Stock – Select stock UOM (Unit of measure)
13. Usage - Select usage UOM (Unit of measure)
14. Cost - Select cost UOM (Unit of measure)
15. Item Kit – If the item is part of a kit select yes. (A kit is a group of items)
16. Default Bill Rate - Enter the bill rate if the item is to be billed when applied
17. Reorder Point – Enter the point item needs to be reordered. This will indicate in the inventory function screen that inventory reorder point level has been reached and item needs to be reordered
18. Minimum Stock – Enter the minimum stock level. This will indicate in the inventory function screen that inventory minimum stock lever has been reached and item needs to be reordered
19. Lifespan- Enter lifespan in number of days of item
20. Accounting Method – Enter how item will be used LIFO (Last in First out) or FIFO (First in First out)
21. Tracking Method – Enter how item will be tracked. Warehouse location, Lot code number or Barcode. If lot code or bin is selected you will be required to enter the information in when receiving inventory
22. Shelf/Bib – Select if item is stored on a shelf or in a bin
23. Image – You can attach an image of the item. Click select and choose location and item to upload
24. Container – Enter Storage UOM and type. Ex. 5 gallon jug
25. Size – Enter conversion factor to Stocking quantity for Container.
Ex. Stock in Gallons but receive 10 (5 gallon jugs) would need conversion size of 5 (10 x 5 = 50 gallons received)
26. GL Code – Enter General Ledger code for billing
27. SDS - Enter link to Material Safety Data Sheet
28. MFG. Label – Enter link to Manufactures label
29. Taxable – Select yes or No if item is taxable when billed
30. Stock Item – Select yes or no if item is a stock item
31. Label –
32. Brand –
33. Cartons/Pallet – Enter number of cartons per pallet
34. X-Ref Item No. –
35. UPC- -Enter UPC code
36. GTIN –
37. Variety – Enter Variety item is used with
38. Submit – click the submit button to save your new item
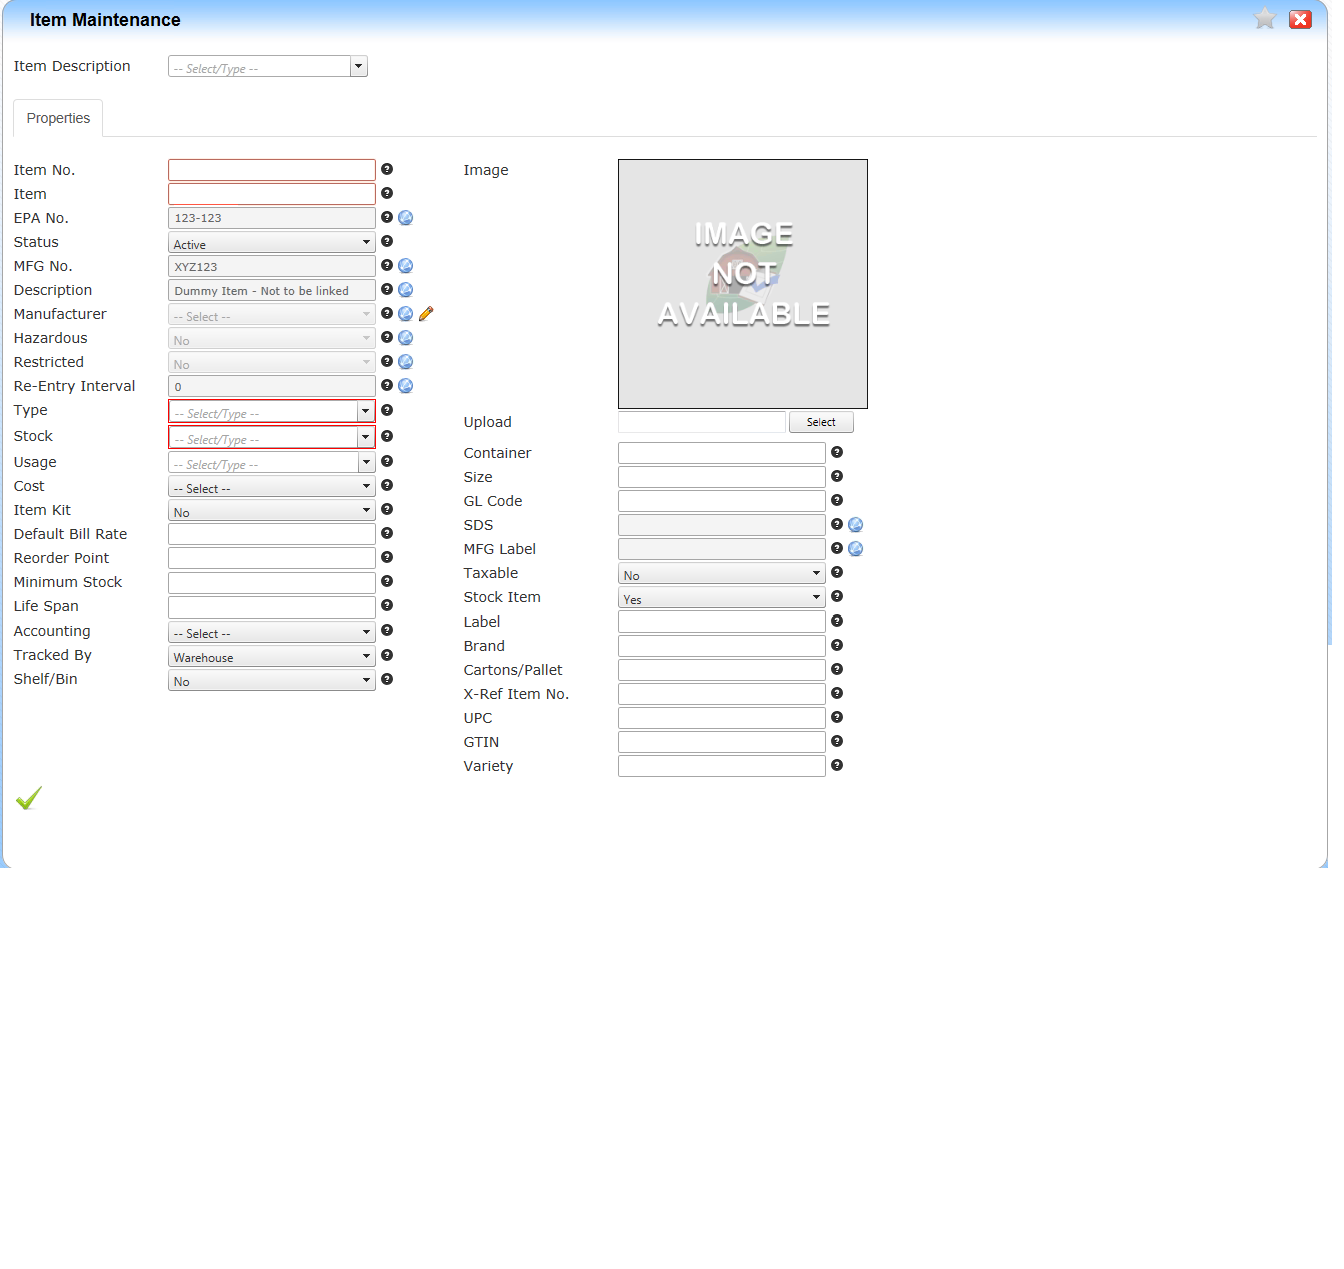
Completed Item
Note: The Blue Globe to the right of the item indicates the Item is linked to the Chemicals Database.


After you submit the new item Ingredients and Safety Data tabs will appear

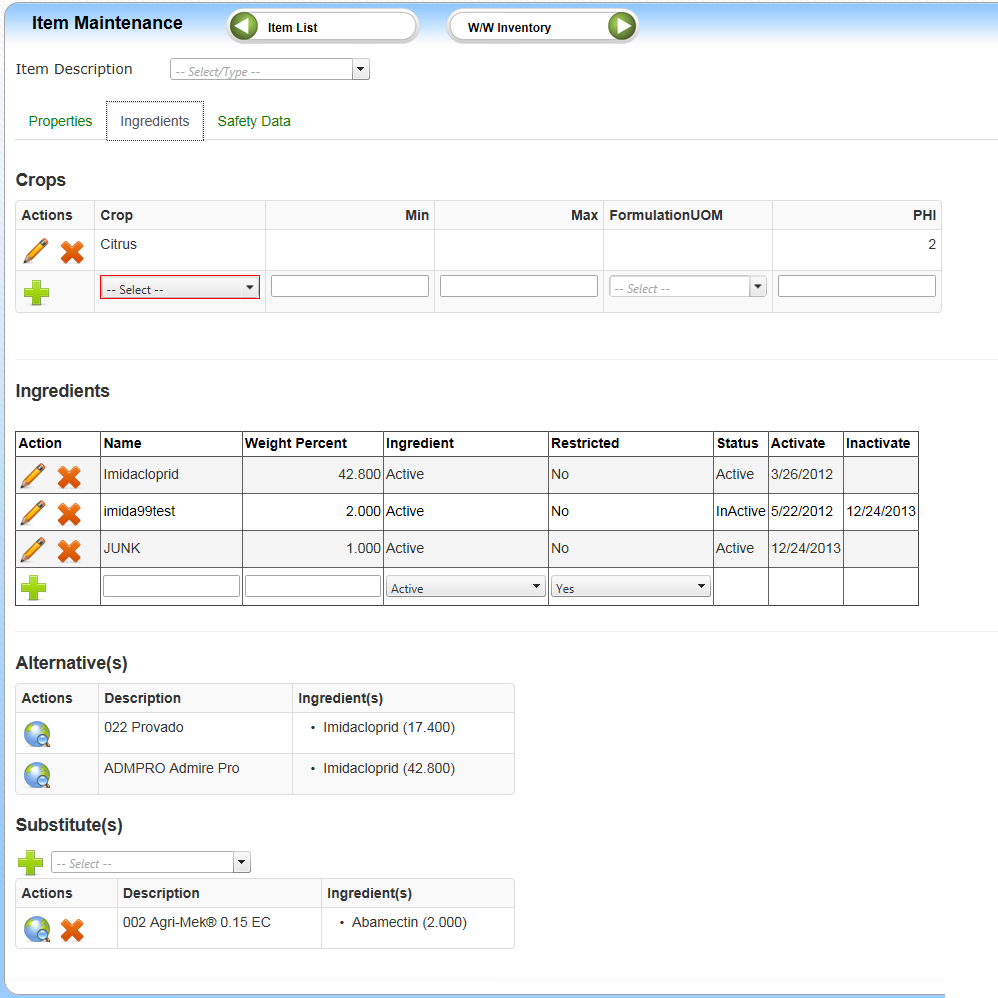
Understand the Ingredients Tab

The ingredients screen is broken down into 4 sections
• Crops – Crop(s) the item is approved for
• Ingredients – Active ingredient with percentage. Note - Association of Fertilizer element provides the correct data percentage on the Fertilizer report.
• Alternatives – Displays Items with same major ingredient
• Substitutes – Items that could be substituted if requested item is not available
Crops
• Crop – Select crop
• Min – Enter minimum quantity allow to be applied during a 12 month period
• Max – Enter maximum quantity allow to be applied during a 12 month period
• Formulation UOM – Unit of Measure used when applied. Could be different from Stocking Unit.
• PHI – Enter the Pre Harvest Interval(PHI) in days
• Click the submit icon to save
Ingredients
• Name - Enter the name of the ingredients(s) in the item.
• Weight Percent - Enter the weight percentage of the ingredient
• Ingredient – System defaults to active. Select inactive if ingredient is inactive
• Restricted – System will default to selection entered when item was entered
• Click the submit icon to save
Alternatives – Alternatives will be pre-selected according to Ingredients entered
Substitutes – Select the Substitute you wish to use if current item unavailable. Click the submit icon to save. The description and Ingredients will be displayed
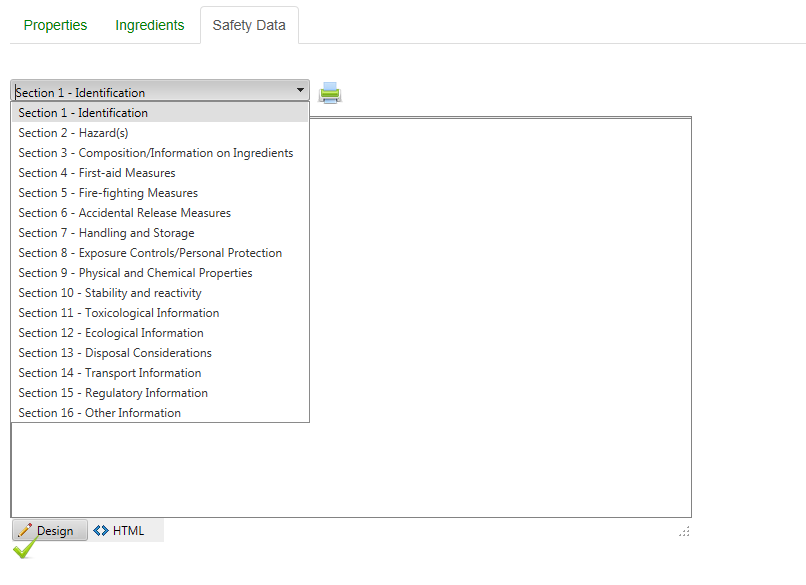
Understand the Safety Data tab

Enter your information for each section. If Chemical Database link used, this will auto-populate. This information can be printed in reports according to flags in Crop Care controls.
Article ID: 1078
Created On: Aug 4, 2015 at 11:04 AM
Last Updated On: Sep 3, 2015 at 10:02 AM
Online URL: http://kb.landmagic.com/article.php?id=1078


