How to manually create a worksheet in LandMagic
Objectives
• How to manually create a worksheet in LandMagic
• How to add a Dependent Worksheet in LandMagic
• How to Balance and Approve a Worksheet
Overview
We are going to manually create a worksheet to be used in clocking workers in and out, enter in pieces harvested (if tracked), how to balance and approve a worksheet. All time entries should be in military time
How to manually create a worksheet in LandMagic:
From the crew schedule page select the new worksheet icon
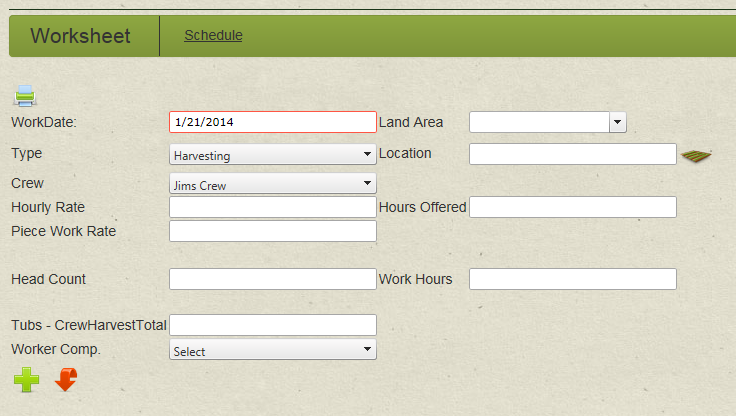
The new worksheet screen will appear.

1. Select worksheet type
2. Confirm the correct date you wish for the worksheet. You can create a worksheet for any date needed.
3. Select the crew for the worksheet
4. Enter the hourly pay rate if you are tracking wages
5. Enter Piece Work Rate
6. Enter head count (optional)
7. Select Land Area (optional)
8. Enter or select location by using the icon to the right(optional)
9. Enter hours offered (optional)
10. Enter work hours ( optional)
11. Enter total tubs/pieces harvested
12. Worker Compensation (if tracked)
When all the fields are completed click insert(Plus) to save. Work sheet will be inserted for the date specified in Crew Schedule and can be viewed in Crew Schedule page.

To enter workers time and pieces harvested, click the status field for the worksheet. This will bring you to the worksheet details page.
How to add a Dependent Worksheet in LandMagic:
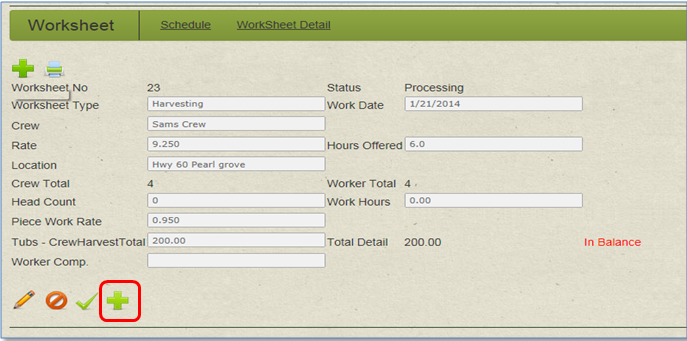
1. To create a dependent worksheet first select the worksheet you want to add the dependent to and select Dependent Worksheet. Note- there must be at least one clock in on the Parent worksheet before the dependent option will display.
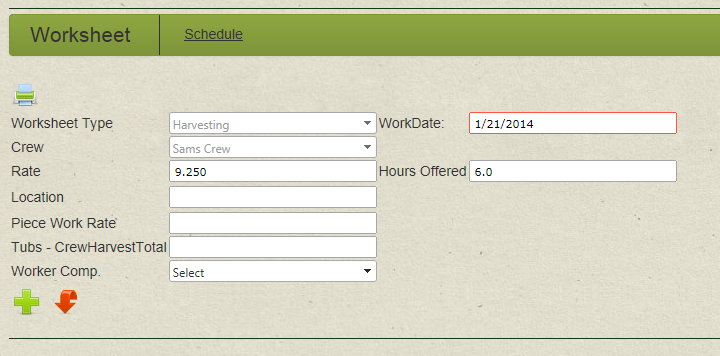
2. Land Magic will prepopulate the worksheet type, date and crew. Enter the new piece rate and Location and click insert
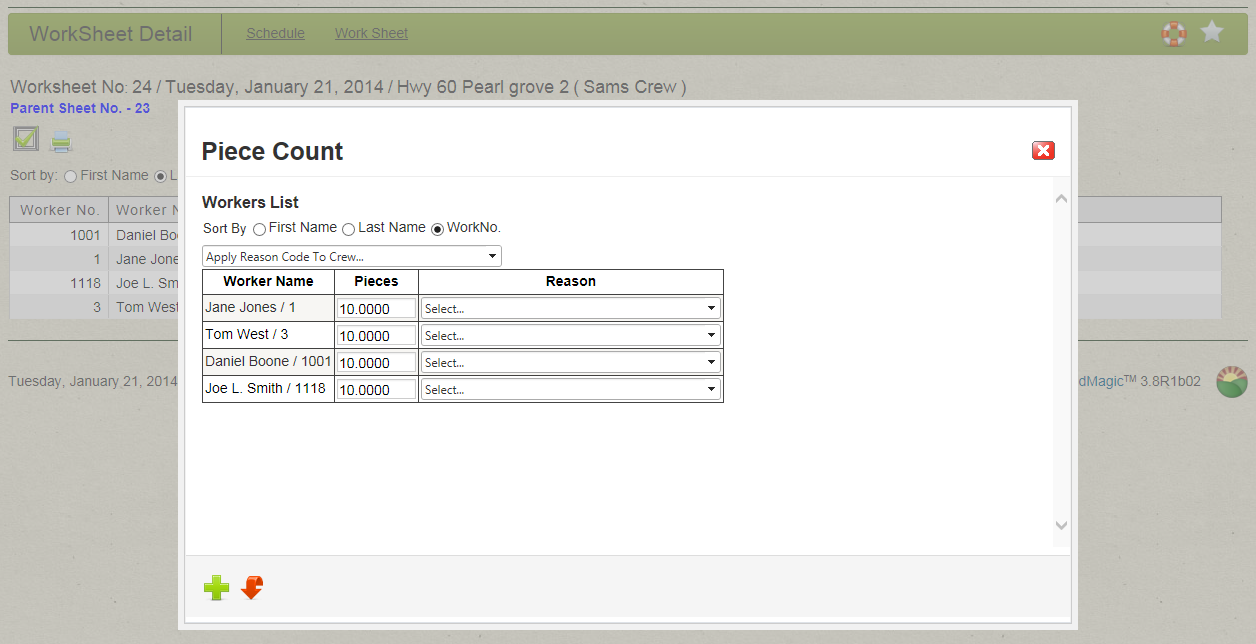
3. From the crew schedule select the dependent worksheet then select Piece count.
4. Only workers clocked in on the parent worksheet will be displayed. Enter pieces harvested and click insert
5. Return to worksheet to balance and approve the worksheet.
How to Balance and Approve a Worksheet:
To Balance the WorkSheet
1. Click on the WorkSheet number in the WorkSheet column located in the Crew Schedule GridView that you wish to Balance. I will be clicking on WorkSheet number 22. This will take us to the WorkSheet page.
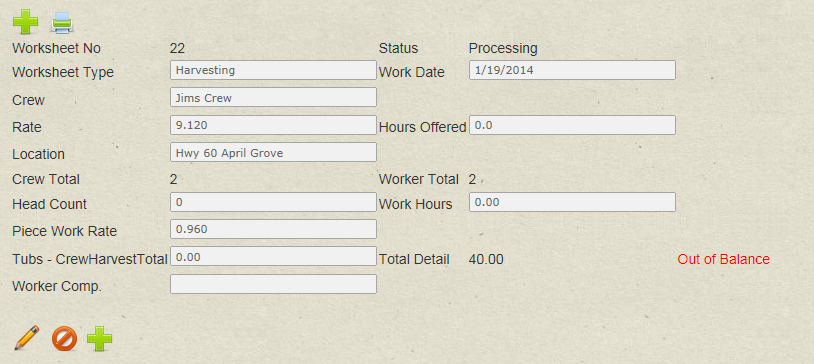
2. Click the Edit icon to unlock the fields on the WorkSheet page. Verify the data is correct – Rate, Hours , Etc.
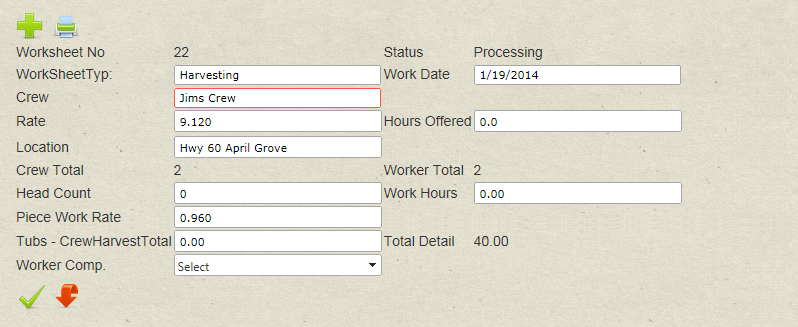
3. Enter the Total number of pieces harvested in the Crew Harvest Total field and click the Submit button to save.
The worksheet can now be approved and you can run your daily and weekly reports.

Click on the Approve button.
Article ID: 33
Created On: Jan 30, 2015 at 11:54 AM
Last Updated On: May 7, 2015 at 12:17 PM
Online URL: http://kb.landmagic.com/article.php?id=33